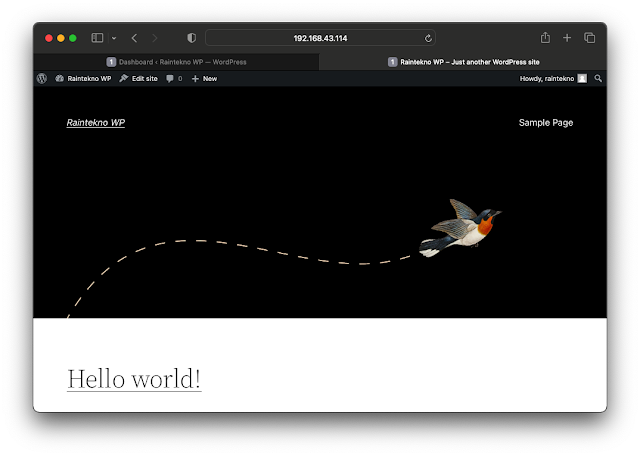
Wordpress merupakan Content Management System (CMS) yang dapat membantu kamu untuk membuat, mengelola, dan memodifikasikan website beserta kontennya tanpa harus menguasai bahasa pemrograman.
Saat ini Wordpress menjadi salah satu sistem manajemen konten yang paling banyak digunakan karena kamu dapat menggunakannya dengan gratis dan open-source.
Persiapan Installasi
Berikut adalah paket atau software yang akan kita install untuk membuat sebuah website menggunakan CMS Wordpress di Ubuntu Server 18.04.
- Apache
- MariaDB
- PHP
- Wordpress
Instalasi Wordpress di Ubuntu 18.04
Sebelum memulai instalasi Wordpress, kita akan lakukan update dan upgrade sistem Ubuntu 18.04 yang sudah kita install. Silakan login menggunakan user root dan ketikan perintah berikut.
apt update && apt upgrade
Setelah selesai melakukan update dan upgrade, selanjutnya kita akan menginstal paket-paket atau software yang telah disebutkan diatas.
Install Apache
Mari kita mulai dengan melakukan instalasi Apache, gunakan perintah berikut ini.
apt install apache2
Cek apakah Apache sudah terinstall dengan mengetikan perintah berikut.
systemctl status apache2
root@raintekno:/home/user# systemctl status apache2
● apache2.service - The Apache HTTP Server
   Loaded: loaded (/lib/systemd/system/apache2.service; enabled; vendor preset:
  Drop-In: /lib/systemd/system/apache2.service.d
           └─apache2-systemd.conf
   Active: active (running) since Tue 2022-10-25 07:35:21 UTC; 1min 25s ago
 Main PID: 16099 (apache2)
    Tasks: 55 (limit: 1104)
   CGroup: /system.slice/apache2.service
           ├─16099 /usr/sbin/apache2 -k start
           ├─16101 /usr/sbin/apache2 -k start
           └─16102 /usr/sbin/apache2 -k start

Oct 25 07:35:21 raintekno systemd[1]: Starting The Apache HTTP Server...
Oct 25 07:35:21 raintekno apachectl[16076]: AH00558: apache2: Could not reliably
Oct 25 07:35:21 raintekno systemd[1]: Started The Apache HTTP Server.
lines 1-15/15 (END)
Untuk pengetesannya, silakan buka browser dan akses IP Address Ubuntu Server. Pada artikel ini, Ubuntu Server memiliki IP Address 192.168.43.114.
Install MariaDB
Selanjutnya kita akan menginstal MariaDB sebagai mesin database tempat kita menyimpan data Wordpress.
apt install mariadb-server mariadb-client
Setelah berhasil diinstall. Kita konfigurasi password yang akan digunakan untuk login ke MySQL. Ketikan perintah berikut.
mysql_secure_installation
Maka akan muncul beberapa prompt untuk kita konfigurasi seperti berikut ini.
NOTE: RUNNING ALL PARTS OF THIS SCRIPT IS RECOMMENDED FOR ALL MariaDB
      SERVERS IN PRODUCTION USE!  PLEASE READ EACH STEP CAREFULLY!

In order to log into MariaDB to secure it, we'll need the current
password for the root user.  If you've just installed MariaDB, and
you haven't set the root password yet, the password will be blank,
so you should just press enter here.

Enter current password for root (enter for none):
OK, successfully used password, moving on...

Setting the root password ensures that nobody can log into the MariaDB
root user without the proper authorisation.

Set root password? [Y/n] Y
New password:
Re-enter new password:
Password updated successfully!
Reloading privilege tables..
 ... Success!


By default, a MariaDB installation has an anonymous user, allowing anyone
to log into MariaDB without having to have a user account created for
them.  This is intended only for testing, and to make the installation
go a bit smoother.  You should remove them before moving into a
production environment.

Remove anonymous users? [Y/n] y
 ... Success!

Normally, root should only be allowed to connect from 'localhost'.  This
ensures that someone cannot guess at the root password from the network.

Disallow root login remotely? [Y/n] y
 ... Success!

By default, MariaDB comes with a database named 'test' that anyone can
access.  This is also intended only for testing, and should be removed
before moving into a production environment.

Remove test database and access to it? [Y/n] y
 - Dropping test database...
 ... Success!
 - Removing privileges on test database...
 ... Success!

Reloading the privilege tables will ensure that all changes made so far
will take effect immediately.

Reload privilege tables now? [Y/n] y
 ... Success!

Cleaning up...

All done!  If you've completed all of the above steps, your MariaDB
installation should now be secure.

Thanks for using MariaDB!
Install PHP
Gunakan perintah berikut untuk menginstall PHP.
apt install php php-mysql
Untuk mengetes apakah PHP sudah terinstal dengan baik. Kita akan membuat sebuah file info.php di directory /var/www/html/ yang isinya informasi paket PHP yang terinstall di server.
nano /var/www/html/info.php
Tambahkan teks berikut ini.
<?php phpinfo(); ?>
Buka browser dan akses http://ip-address/info.php
Membuat Database Wordpress
Selanjutnya kita akan membuat database untuk Wordpress. Silakan login ke MySQL dengan perintah berikut.
mysql -u root -p
Masukkan password root MySQL yang telah kita konfigurasi pada tahap instalasi MySQL.
Maka akan muncul tampil seperti berikut.
Welcome to the MariaDB monitor.  Commands end with ; or \g.
Your MariaDB connection id is 30
Server version: 10.1.48-MariaDB-0ubuntu0.18.04.1 Ubuntu 18.04

Copyright (c) 2000, 2018, Oracle, MariaDB Corporation Ab and others.

Type 'help;' or '\h' for help. Type '\c' to clear the current input statement.

MariaDB [(none)]>
Kita akan membuat database dengan nama db_wordpress.
CREATE DATABASE db_wordpress;
Kemudian buat user dan password untuk database Wordpress yang telah kita buat. User dan Password yang akan kita buat nantinya digunakan pada saat setup instalasi Wordpress.
CREATE USER 'wp'@'localhost' IDENTIFIED BY 'passwordkamu';
Silakan ganti bagian 'passwordkamu' dengan password yang akan kamu gunakan.
Selanjutnya kita akan memberikan akses database untuk user wp yang telah kita buat sebelumnya.
GRANT ALL ON db_wordpress.* TO 'wp'@'localhost' IDENTIFIED BY 'passwordkamu';
Konfigurasi database sudah selesai. Silakan keluar dari MySQL.
FLUSH PRIVILEGES;

exit;
Download Wordpress
Kita akan mendownload file Wordpress terbaru. Sebelumnya kita pindah directory /tmp terlebih dahulu.
cd /tmp
wget https://wordpress.org/latest.tar.gz
Setelah download selesai. Lakukan ektrak file dengan perintah berikut.
tar -zxvf latest.tar.gz
Akan ada folder dengan nama wordpress. Folder tersebut merupakan hasil ekstrak file latest.tar.gz. Kemudian copy ke directory /var/www/html/
cp -R wordpress /var/www/html/
Ubah pemilik direktori wordpress menjadi www-data menggunakan perintah chown
cp -R wordpress /var/www/html/
Ubah file permission folder wordpress menggunakan perintah chmod
cp -R wordpress /var/www/html/
Konfigurasi Apache
Konfigurasi ini bertujuan agar Directory root pada webserver mengarah ke folder wordpress. Sehingga ketika kita mengakses IP Address server, langsung mengarah pada Wordpress.
nano /etc/apache2/sites-enabled/000-default.conf
Kemudian akan muncul tampilan seperti berikut.
<VirtualHost *:80>
        # The ServerName directive sets the request scheme, hostname and port that
        # the server uses to identify itself. This is used when creating
        # redirection URLs. In the context of virtual hosts, the ServerName
        # specifies what hostname must appear in the request's Host: header to
        # match this virtual host. For the default virtual host (this file) this
        # value is not decisive as it is used as a last resort host regardless.
        # However, you must set it for any further virtual host explicitly.
        #ServerName www.example.com

        ServerAdmin webmaster@localhost
        DocumentRoot /var/www/html/
Ubah bagian DocumentRoot menjadi /var/www/html/wordpress. Sehingga tampilannya menjadi seperti berikut.
<VirtualHost *:80>
        # The ServerName directive sets the request scheme, hostname and port that
        # the server uses to identify itself. This is used when creating
        # redirection URLs. In the context of virtual hosts, the ServerName
        # specifies what hostname must appear in the request's Host: header to
        # match this virtual host. For the default virtual host (this file) this
        # value is not decisive as it is used as a last resort host regardless.
        # However, you must set it for any further virtual host explicitly.
        #ServerName www.example.com

        ServerAdmin webmaster@localhost
        DocumentRoot /var/www/html/
Restart Apache dengan perintah systemctl.
systemctl restart apache2
Instalasi Wordpress
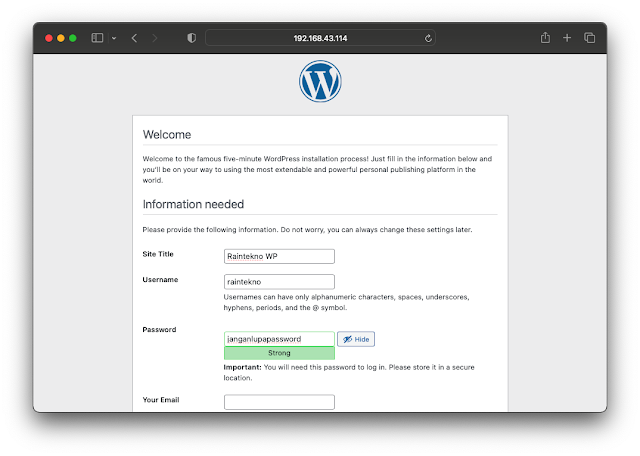
Buka browser dan akses ke IP Address server kita. Disini server menggunakan IP Address 192.168.43.114. Maka akan muncul tahapan untuk memulai instalasi Wordpress.
Pilih bahasa yang akan digunakan kemudian klik Continue.
